|
  
|
||
|
|
||
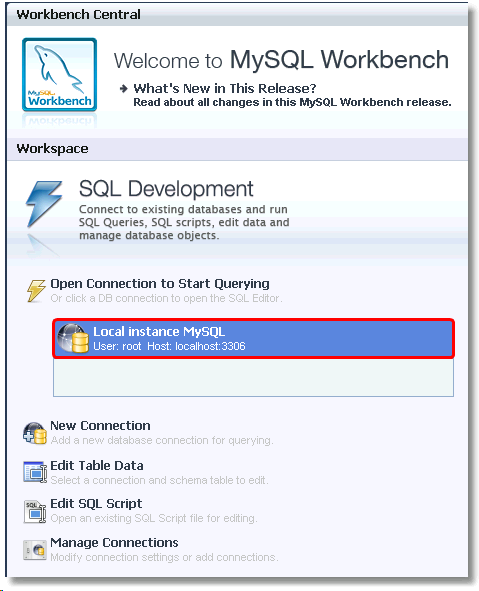
After installing MySQL Workbench, it needs to be configured to connect to the database.
Upon launching the workbench, click the New Connection option to add a new database.
Any databases then configured will appear in the box above:
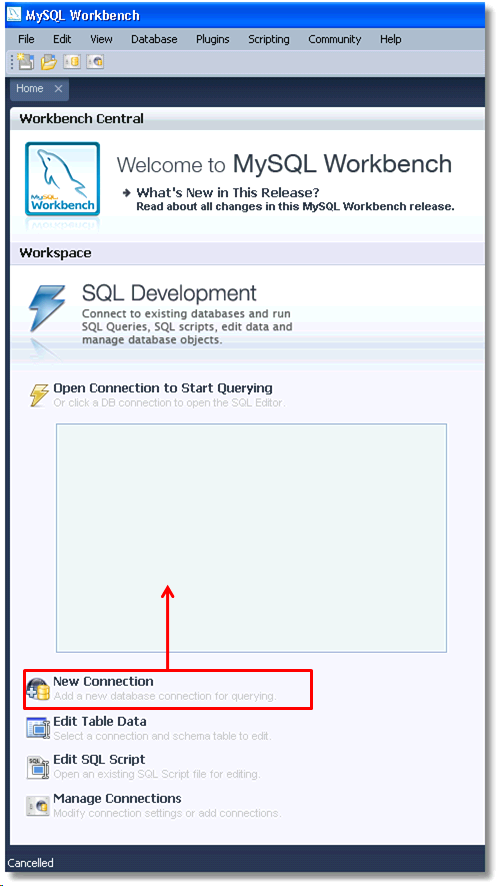
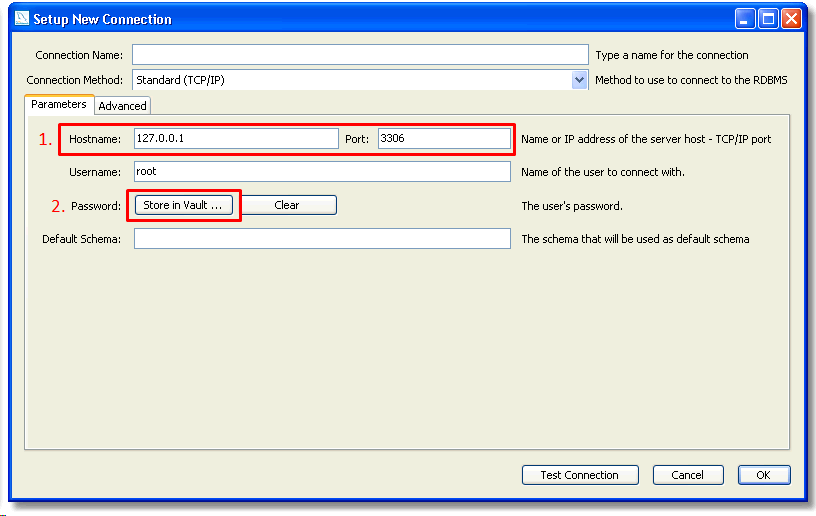
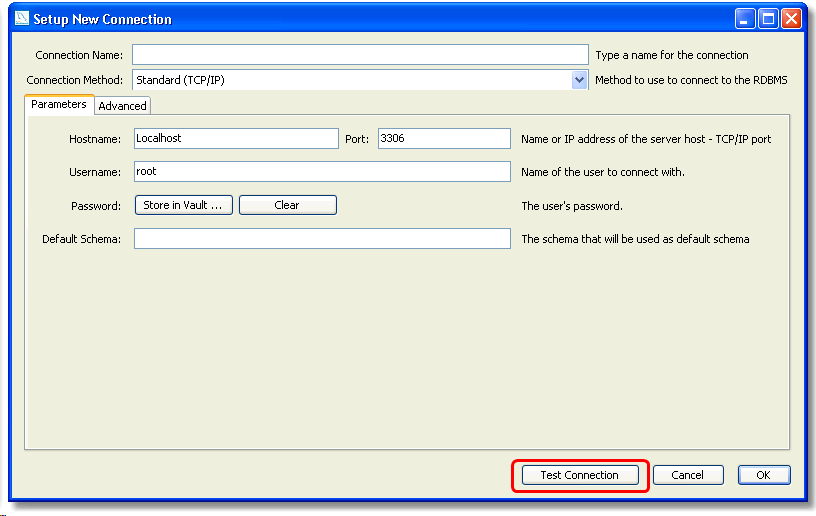
Once you have clicked on New Connection the setup window will open.
Set the name of the connection as well as the server host IP address. The default settings are set to the local host
(Note: You may need to set the hostname to 'localhost')
After entering the information click on the Store in Vault button:
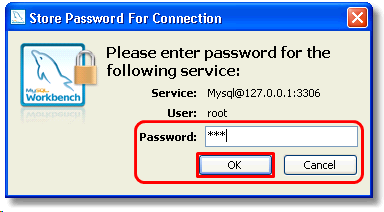
The program will then ask for the password you inputted earlier during the MySQL Installation.
Enter in the box below and then click the ok button:
Once you have entered the password you can click the Test Connection button to make sure all the parameters are correct before applying the connection. It may ask you to input the password again but this time will offer the option to save it.
The following message will appear if everything has been inputted correctly:
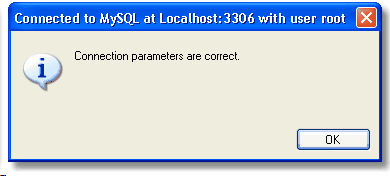
After the details have been inputted click OK. The connection will now appear in the list on the main page of the workbench: