|
  
|
||
|
|
||
Because of the volume of transactions by synchronization the Microsoft SQL server log files will grow considerably. Regular maintaining is required to shrink the log files. This can be done under a Microsoft SQL server service plan using DBCC SHRINKFILE.
Example on the default ExSync SQL Schema where the Red Text is replaced with the database name and log:-
USE [ExContact]
GO
ALTER DATABASE [ExContact] SET RECOVERY SIMPLE WITH NO_WAIT
DBCC SHRINKFILE(ExContact_log, 1)
ALTER DATABASE [ExContact] SET RECOVERY FULL WITH NO_WAIT
GO
This can also be run as a query in the SQL Management Console or set as a management task with SQL Agent.
ExSync has some tools to do this and will pick up the current selected database and log files from the connected Server & database
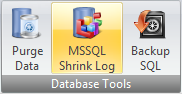
Select the 'Shrink MSSQL Server Log Files' button to shrink the log files.
It is highly recommended that a backup is taken before shrinking the log file See Backup
You can also create a task within the Windows Task Scheduler.
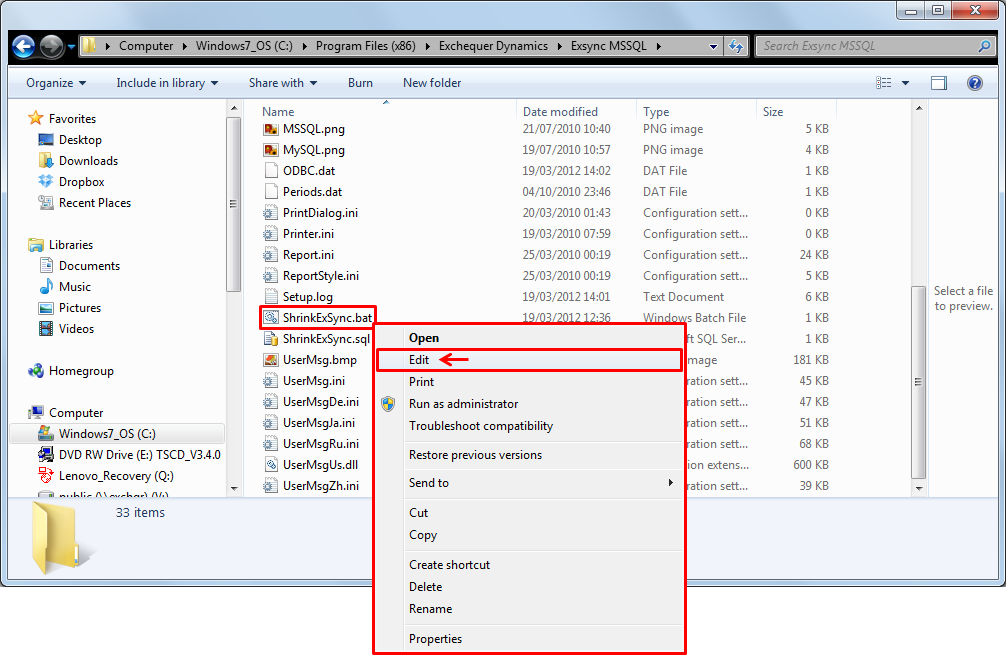
To create a Windows Task to shrink the log files, you first have to edit the batch file saved in the ExSync installation root folder.
To do this first open Windows Explorer and go the the folder you installed ExSync in,
By Default on Windows XP this is:
C:\Program Files\Exchequer Dynamics\ExSync MSSQL
By Default on Windows 7 64bit this is:
C:\Program Files (x86)\Exchequer Dynamics\ExSync MSSQL
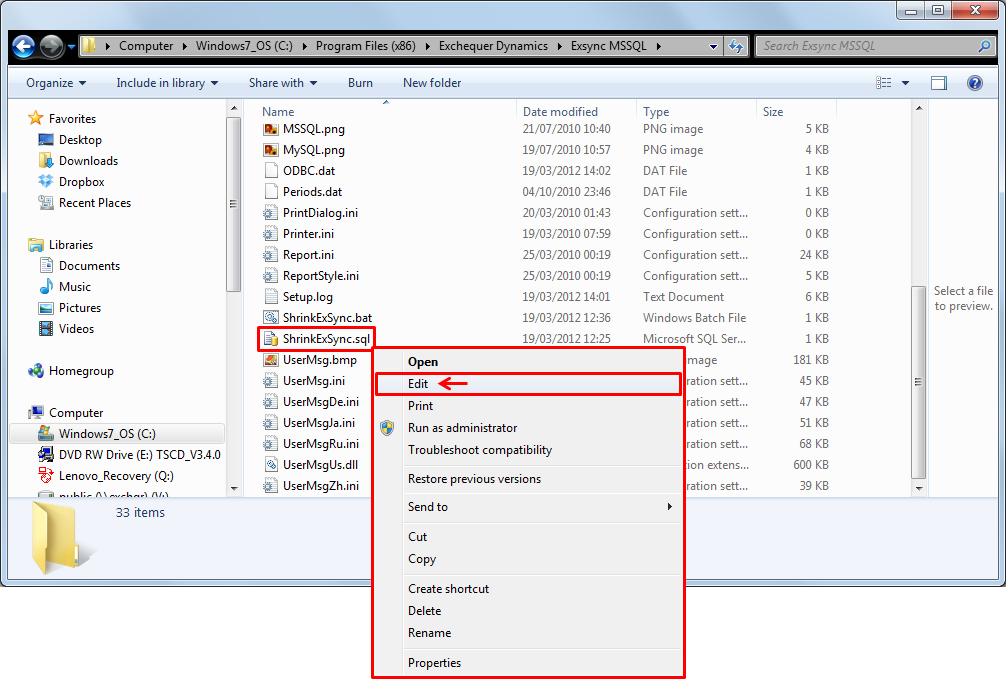
Once you have located this folder, Right-Click on the file named ShrinkExSync.bat and select the Edit option:
This should open the batch file in Notepad:
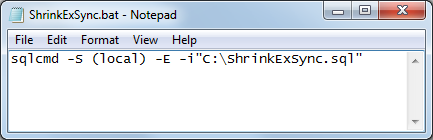
You need to change the text C:\ShrinkExSync.sql to the location of the ShrinkExSync.sql file in the root of the program file. In this example I am on a 64bit machine and so the final text will look as such:

Save the file as it is already named by clicking File > Save and then close Notepad.
In the same folder as ShrinkExSync.bat is a file named ShrinkExSync.sql. Repeat the process as before to edit the sql file in notepad:
This time you will see the text:
USE [ExContact]
GO
ALTER DATABASE [ExContact] SET RECOVERY SIMPLE WITH NO_WAIT
DBCC SHRINKFILE(ExContact_log, 1)
ALTER DATABASE [ExContact] SET RECOVERY FULL WITH NO_WAIT
GO
Change the text in Red to the database name you wish to purge and then click File > Save before closing.
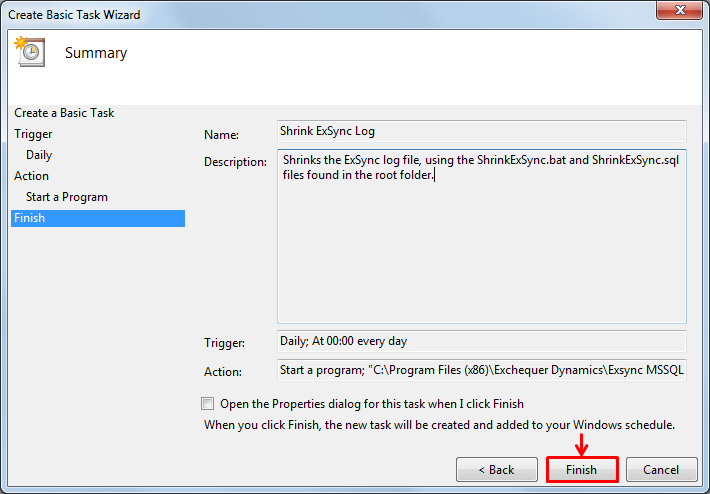
The last step is to create the task.
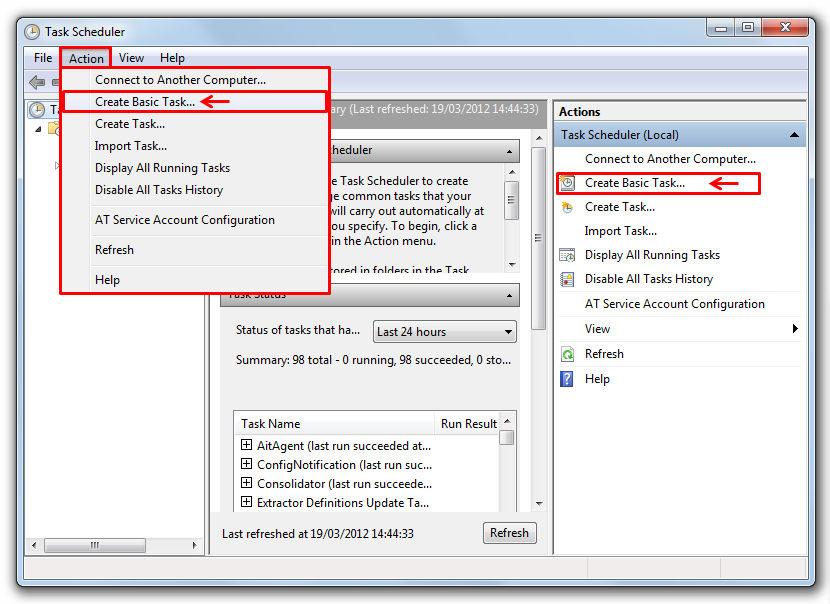
To open Windows Task Scheduler, click Start > All Programs > Accessories > System Tools > Task Scheduler.
When the scheduler loads up, select Action > Create New Basic Task from the menu at the top, or simply click the link on the right:
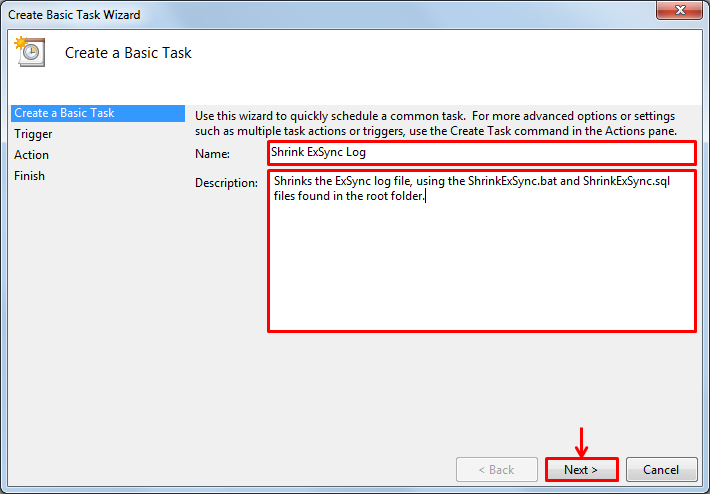
In the window that appears, give a basic name and description and click Next:
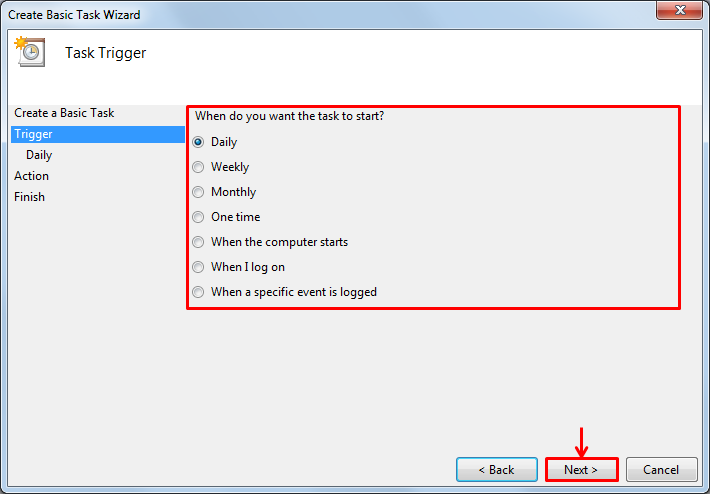
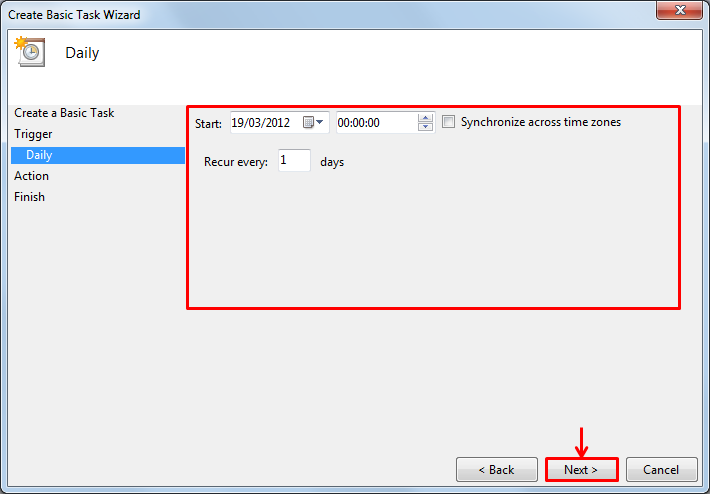
You can now select how frequently you would like to Shrink the log file.
You can select any time period you would like. In this example the task will be run daily at midnight to ensure no users are logged in:
The next step allows you to set the start date, time period and also recurrence:
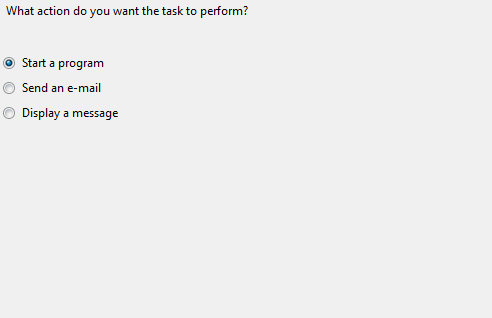
Click Next again to select Start a Program:
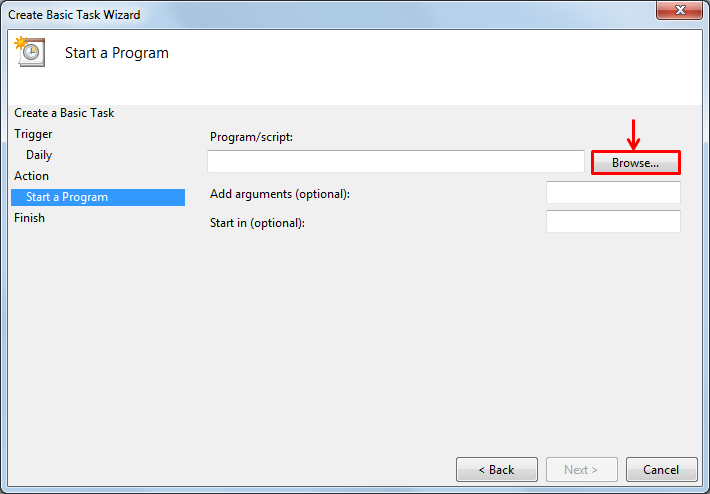
Click the browse button to select your application:
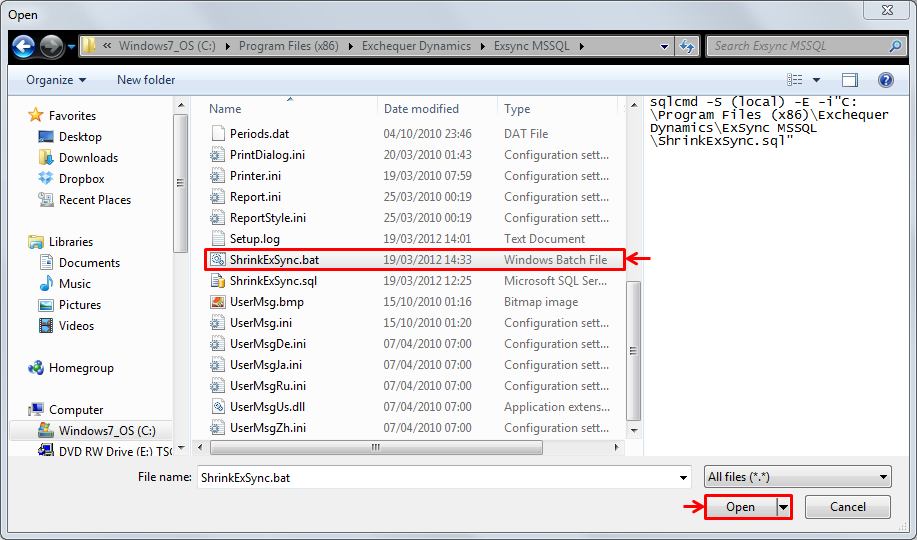
Navigate to the batch file from earlier and click Open:
Finally, click Finish and the task will be saved: